Deploying CAPEv2 on AWS - A Comprehensive Guide

Introduction
CAPEv2, an open-source automated malware analysis system, stands at the forefront of innovative solutions for dissecting and comprehensively understanding malware behavior.
Developed as an evolution of Cuckoo Sandbox, CAPEv2 has established itself as a powerful tool for automatically executing and analyzing files within an isolated environments.
Key Features and Capabilities:
- Comprehensive Analysis Results:
- CAPEv2 automatically runs and analyzes files, providing detailed insights into malware behavior.
- Analysis results encompass traces of win32 API calls, created and deleted files, memory dumps, network traffic traces, and screenshots of the Windows desktop during malware execution.
- Rich History and Development:
- Originating from the Cuckoo Sandbox project in 2010, CAPEv2 is a product of continuous development and enhancements.
- Notable milestones include releases, contributions, and the establishment of the Cuckoo Foundation in March 2014.
- Versatility in Use Cases:
- Designed to analyze various file types, including Windows executables, DLL files, PDFs, Microsoft Office documents, URLs, HTML files, PHP scripts, and more.
- Modular design enables integration into larger frameworks, showcasing its adaptability to diverse analysis needs.
- Modular Architecture:
- CAPE Sandbox comprises central management software and isolated virtual machines (Guest machines) for analysis.
- The Host machine manages the entire analysis process, while the Guest machines provide secure environments for executing and analyzing malware samples.
- Limitless Customization:
- CAPE’s modularity and scripting capabilities empower users to customize and extend its functionality, making it a versatile tool for varied use cases.
Why deploy CAPE on AWS?
As of February 25, 2024, there has been a noticeable scarcity of open-source malware analysis automated sandbox projects designed to seamlessly integrate with AWS.
Traditionally, sandbox projects like CAPE and Cuckoo, on which CAPE is based, were primarily installed on bare metal servers.
However, this approach came with limitations and dependencies on specific hardware.
The breakthrough in leveraging AWS for malware analysis lies in its on-demand infrastructure and pay-as-you-go model, eliminating the need for specialized hardware and allowing users to pay only for the resources they consume. One notable milestone in this paradigm shift was the initiative undertaken by the Checkpoint Research team in 2019.
They introduced a project that utilized AWS for deploying the Cuckoo system, providing a groundbreaking alternative to bare metal installations.
Unfortunately, the Checkpoint project. appears to be unmaintained.
In 2022, the CAPE community seized the opportunity to enhance their project’s capabilities by integrating the AWS deployment option. The CAPE project, building upon the foundation laid by Checkpoint’s initiative, introduced modifications that enabled the utilization of Amazon EC2 instances as guest machines. This offered an alternative of the traditional use of KVM or other virtualization methods, as AWS does not support nested virtualization unless a costly bare metal server is employed.
How it works?
CAPE operates with a host responsible for managing analysis machinery where malware executes and an Amazon Machine Image (AMI) that requires building. Upon malware submission, the CAPE host initiates an AMI instance, conducts analysis, and retrieves results through an HTTP agent installed on the AMI. This process enables comprehensive behavioral analysis reports on the malware.
Acknowledgment: It is worth mentioning that although CAPEv2 is highly maintained, the AWS module, being a community module, is not maintained by the core developers.
During my installation, I encountered errors that were resolved thanks to plutusrt. He provided assistance with the live error, identified the bug, and addressed it. More details can be found here.
Warning: AWS Policy Guidelines Sandbox analysis must occur in a secure AWS account and VPC.
Inbound traffic is restricted to customer-owned IP addresses.
Outbound internet access from within AWS, including via proxies, is prohibited.
Simulation services (e.g., INetSim) must reside in the same VPC as the malware.
Consider alternate solutions if internet access is required during testing, as AWS may not be suitable due to these limitations.
Overview of the Deployment Process:
Preparing the CAPEv2 Guest Machine VMDK:
- Set up a local Windows 10 VM for CAPE analysis, configure it for optimal performance, and export the VMDK file encapsulating the VM state.
Configuring S3 Bucket, VM import roles, AWS-CLI, and converting the VMDK to AMI:
- Upload the VMDK to an AWS S3 bucket, streamline the process with AWS-CLI, and convert the VMDK to an AMI.
- Create users and roles for secure VM import processes.
Setting and Configuring VPC:
- Establish a dedicated VPC for malware analysis, implementing security groups for isolation.
- Fine-tune network settings to meet specific malware analysis requirements.
Installing and Configuring CAPEv2 Host:
- Install the CAPEv2 server on an Ubuntu 22.04 LTS instance within the AWS environment.
- Configure the CAPE conf file to ensure optimal performance and compatibility.
Prerequisites:
Basic familiarity with AWS is required.
A dedicated AWS account with an administrative IAM user
It is highly recommended to read the CAPEv2 documentation to understand the concepts.
It will help troubleshoot any issues you might encounter.
Step-by-step Installation Guide:
Preparing the Guest machine VMDK
Step-by-step Installation Guide Preparing the Guest machine VMDK
1. Download and install the Win10_21H2_English_x64 ISO
CAPEv2 supports Windows 7, and Win10_21H2_English_x64.
As the Win10_21H2 version is considered End-of-Life (EOL), it is no longer available for download from Microsoft.
To obtain the ISO, I recommend using the Wayback Machine on archive.org. Here is the download link:
https://ia902708.us.archive.org/11/items/win-10-21-h-2-english-x-64_20220529/Win10_21H2_English_x64.iso
2. Verify the integrity of the ISO using:
Windows:
1
Get-FileHash .\win-10-21-h-2-english-x-64_20220529\Win10_21H2_English_x64.iso
Unix:
1
sha256sum  win-10-21-h-2-english-x-64_20220529/Win10_21H2_English_x64.iso on


3. Using that ISO create a new Virtual Machine on Vmware workstation pro:
To avoid automatic updates, leave the machine in host-only mode during the installation until you disable Windows updates.
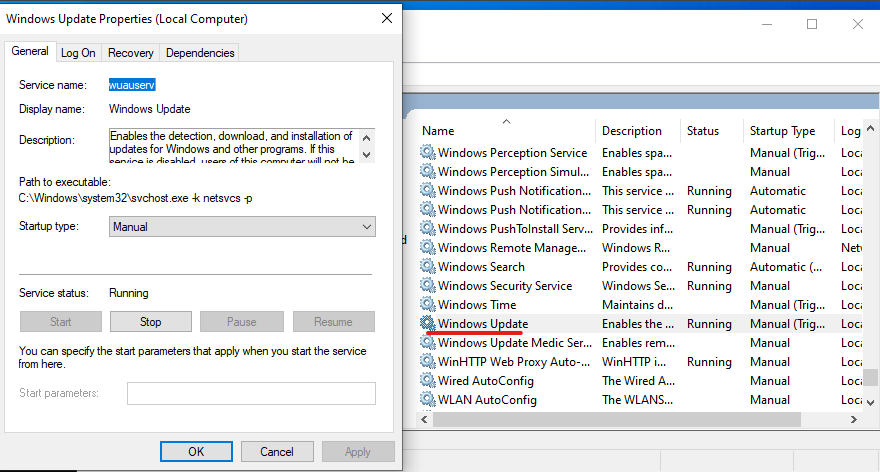
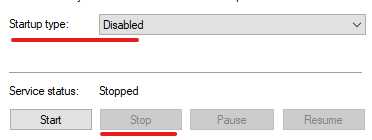
4. Disable Windows updates:
1
C:\Windows\system32>services.msc
5. Install Python 3.10.6 (32-bit).:
1
wget https://www.python.org/ftp/python/3.10.6/python-3.10.6.exe -o python-3.10.6.exe

6. Verify the installation:
1
2
C:\Windows\system32>python --version
Python 3.10.6
7. Install Pip and Pillow:
1
2
python -m pip install --upgrade pip
python -m pip install Pillow==9.5.0
8. Disable Windows Firewall.
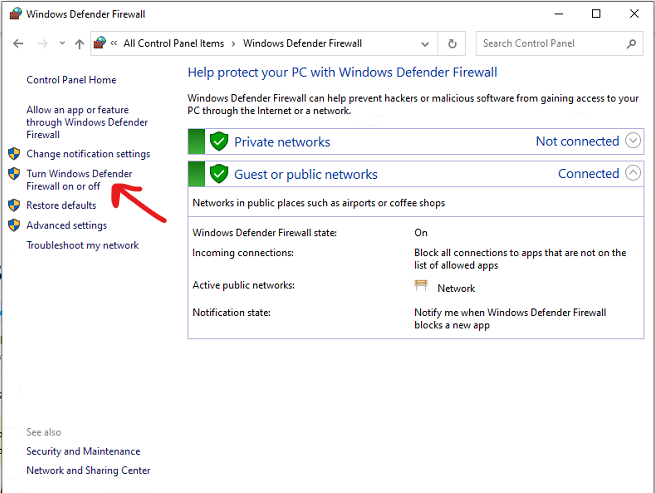
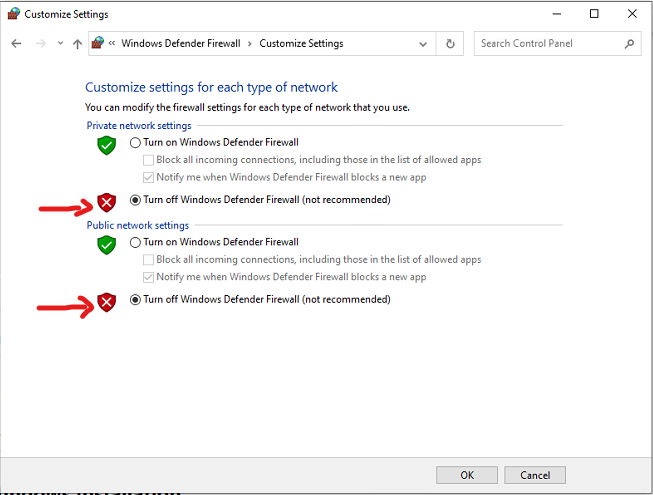 Credit: https://capev2.readthedocs.io/en/latest/installation/guest/network.html
9.Enable RDP with no password:
1
Set-ItemProperty -Path 'HKLM:\System\CurrentControlSet\Control\Terminal Server' -Name "fDenyTSConnections" -Value 0
1
Set-ItemProperty -Path 'HKLM:\System\CurrentControlSet\Control\Terminal Server\WinStations\RDP-Tcp' -Name "UserAuthentication" -Value 0
1
Set-ItemProperty -Path 'HKLM:\SOFTWARE\Microsoft\Windows\CurrentVersion\Policies\System' -Name 'LimitBlankPasswordUse' -Value 0
1
Set-ItemProperty -Path 'HKLM:\SYSTEM\CurrentControlSet\Control\Lsa' -Name 'LimitBlankPasswordUse' -Value 0
10.Disable Noisy Network Services:
Tredo
1
netsh interface teredo set state disabled
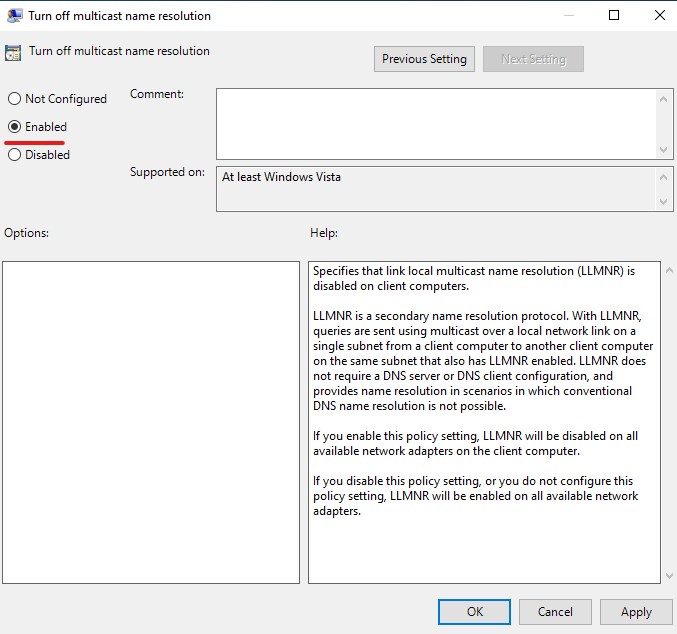
Link Local Multicast Name Resolution (LLMNR)
Open the Group Policy editor by typing gpedit.msc into the Start Menu search box, and press Enter. Then navigate to Computer Configuration> Administrative Templates> Network> DNS Client, and open Turn off Multicast Name Resolution. Set the policy to enabled.
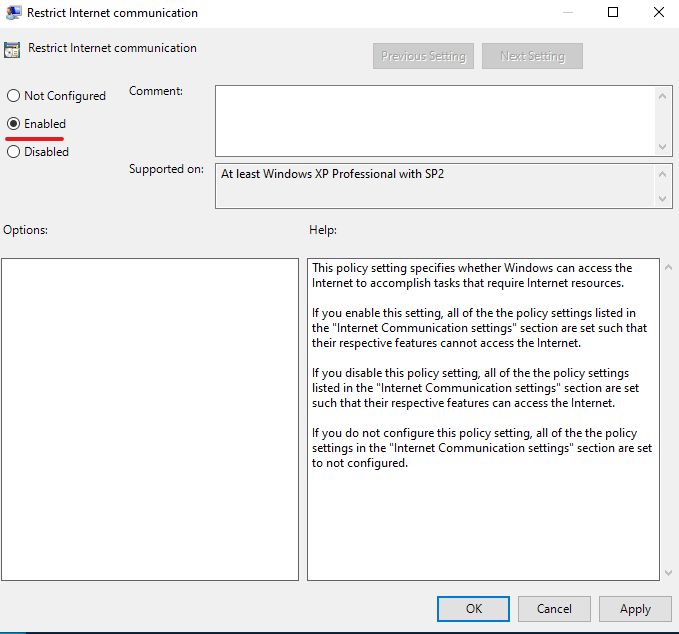
Network Connectivity Status Indicator, Error Reporting, etc
Windows has many diagnostic tools such as Network Connectivity Status Indicator and Error Reporting, that reach out to Microsoft servers over the Internet. Fortunately, these can all be disabled with one Group Policy change.
Open the Group Policy editor by typing gpedit.msc into the Start Menu search box, and press Enter. Then navigate to Computer Configuration> Administrative Templates> System> Internet Communication Management, and open Restrict Internet Communication.
Set the policy to enabled.
11.Disable Microsoft Defender:
1
Set-MpPreference -DisableRealtimeMonitoring $true -DisableScriptScanning $true -DisableBehaviorMonitoring $true -DisableIOAVProtection $true -DisableIntrusionPreventionSystem $true
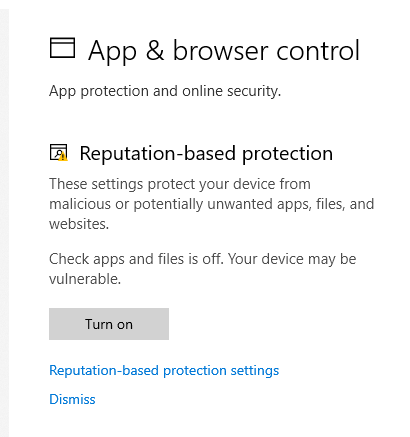
12.Disable App and Browser Control:
13.Download and execute the “disable-defender.ps1” PowerShell script. ` https://github.com/jeremybeaume/tools/blob/master/disable-defender.ps1`
1
Set-ExecutionPolicy Unrestricted
1
.\disable-defender.ps1
14.Reboot:
1
Restart-Computer -Force
15.Download and install the CAPEv2 agent on the guest machine, following the CAPEv2 documentation:
Download the agent:
Choose your own Python name for the agent; the name is irrelevant as long as you avoid any mention of CAPE or anything blatant to evade anti-VM detection algorithms.
1
wget https://raw.githubusercontent.com/kevoreilly/CAPEv2/master/agent/agent.py -o randomprogramname.pyw
Install the agent using the CAPEv2 guide .
Optional:
Find and install Microsoft Office 2010 Pro Plus with SP2 September 2020 (x86).
The guest is now ready, let’s export and upload it to AWS.
Configuring S3 Bucket, VM import roles, AWS-CLI, and converting the VMDK to AMI:
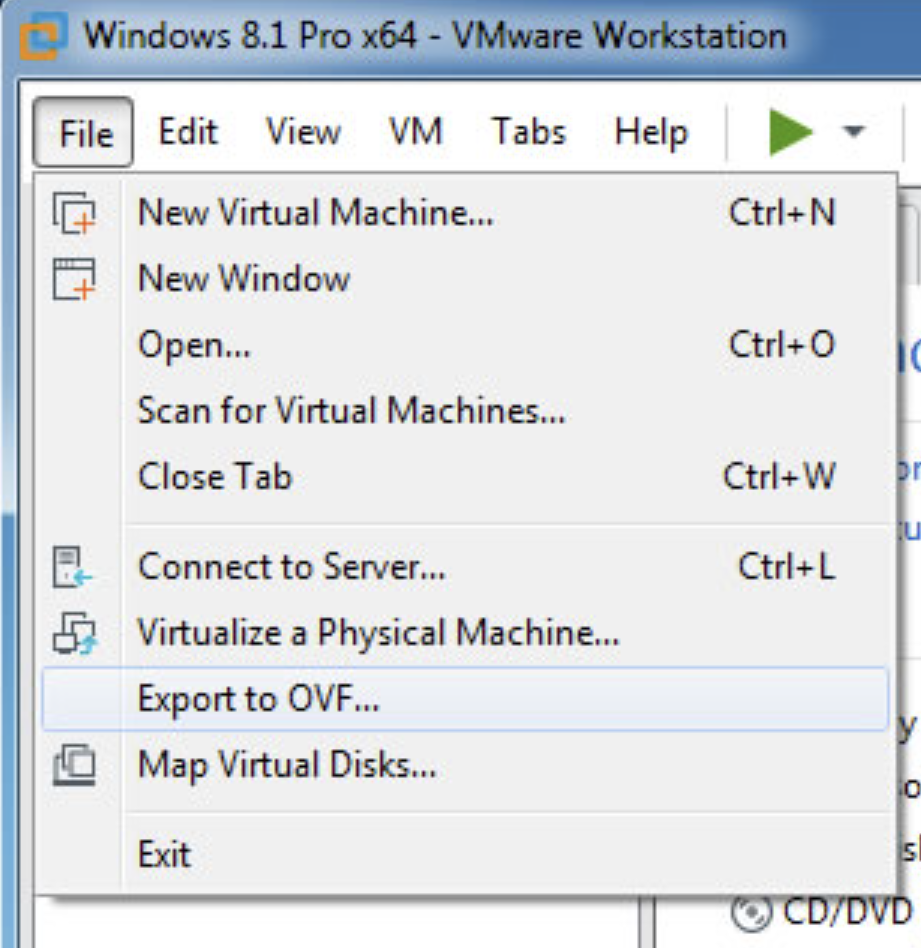
1.Importing the VMDK to AWS On vmware export by using the export to OVF option this will create and OVF and A VMDK files on a desired locations
2.Create a bucket or use an existing one:

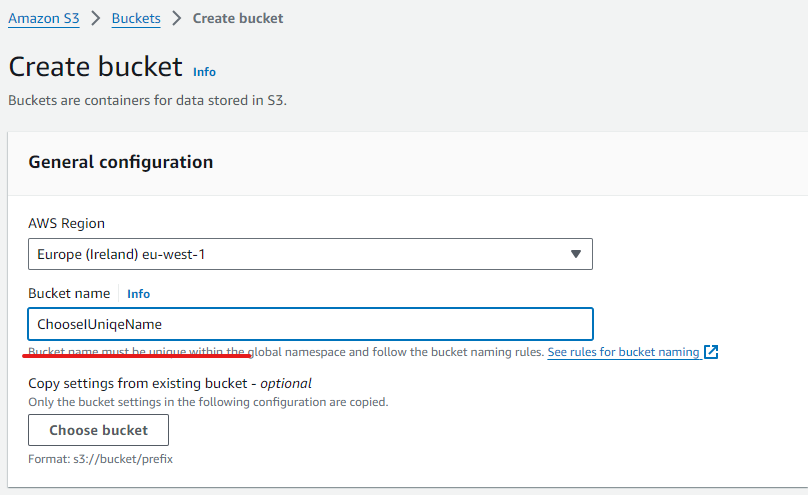
Leave all default configurations and save the bucket.

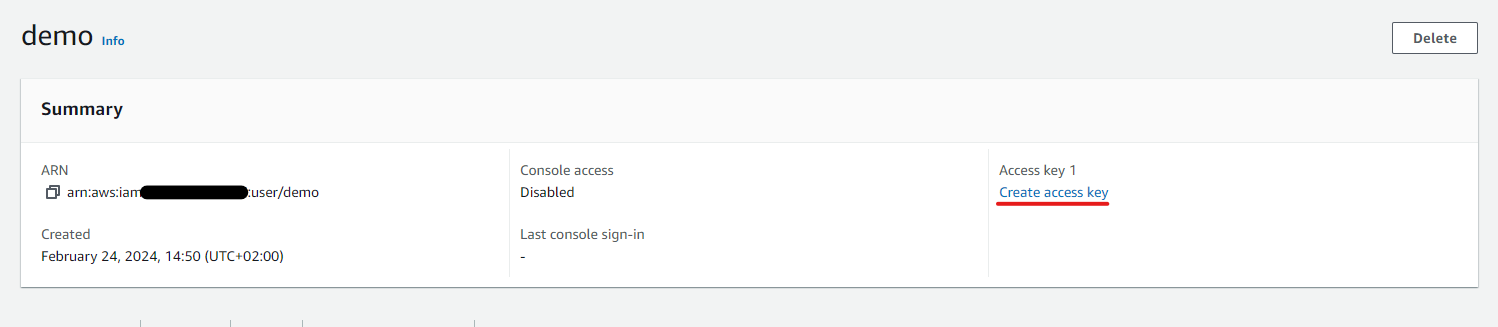
3.Create access key and configure the AWS-CLI:
Go to IAM > Users > choose your own user
Create access key
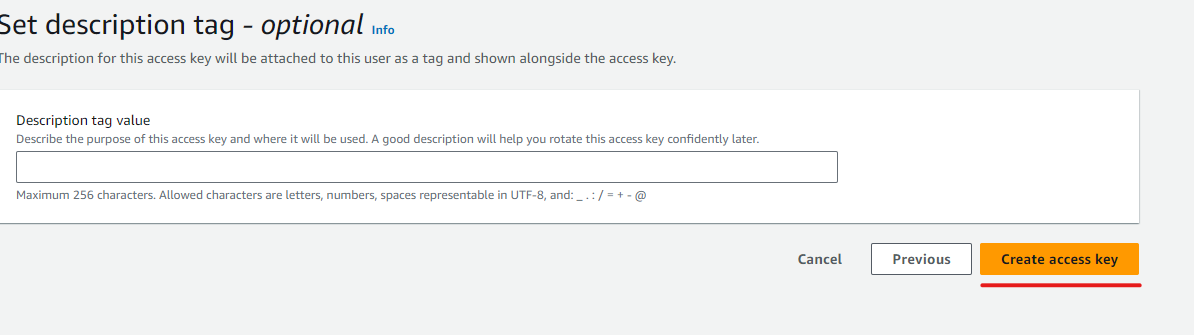
Choose command line interface
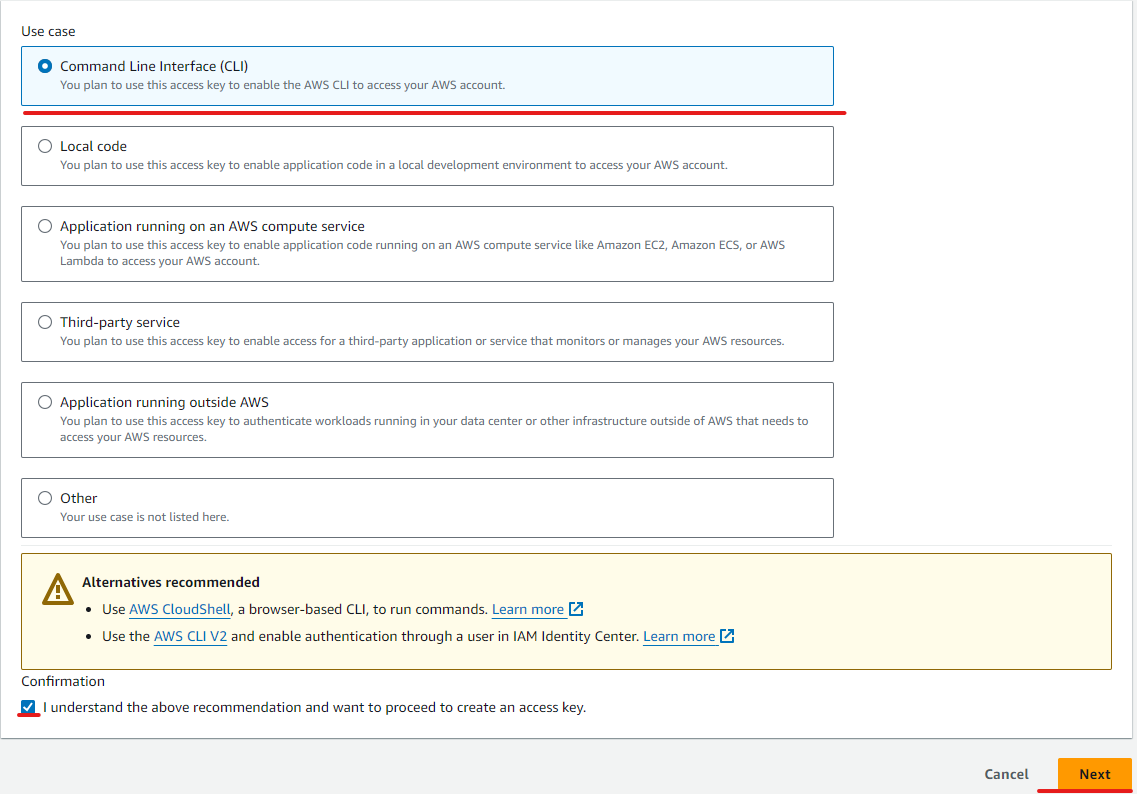
Create access key
4.Follow the AWS guide to install the AWS-CLI (platform-dependent).
5.Configure the AWS CLI.
1
aws configure
You will be prompted to enter the access key ID, the secret access key, default region, and default output format (by default JSON).
6.Upload the VMDK file to S3.
1
aws s3 cp .\Windows-Guest-disk1.vmdk s3://machinery-import/
This can take a while.
Meanwhile, we will configure our role for creating the AMI and the “containers.json” file that is required to create the bucket.
7.Creating the role:
Refer to the detailed AWS guide for creating this role.
4.Follow the AWS guide to create the role.
8.Create the “containers.json” file.
1
2
3
4
5
6
7
8
[
  {
    "Description": "CAPEv2-Guest-AMI",
    "Format": "vmdk",
    "Url": "s3://YourBucketName/YourVmdkName.vmdk"
  }
]
9.Convert the VMDK from S3 to an AMI once the S3 upload is complete.
1
aws ec2 import-image --description "CAPEv2 Guest VM" --disk-containers "file://C:\Users\DevSecOps\containers.json"
To check the status of the machine, use the ImportTaskId value from the JSON.
1
aws ec2 describe-import-image-tasks --import-task-ids "TASK ID"
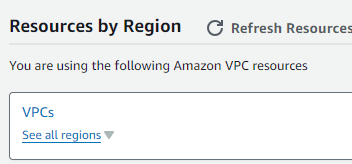
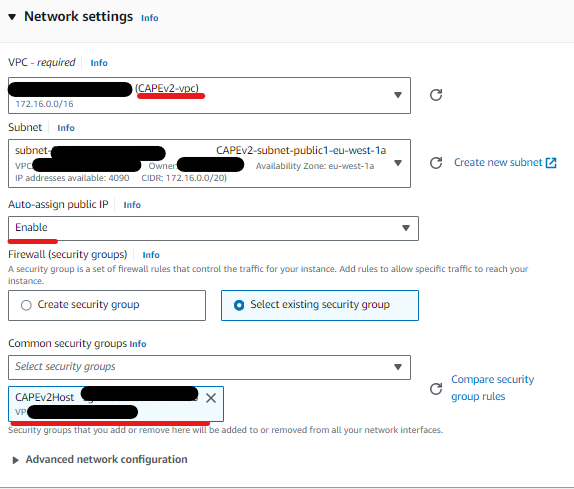
Setting and Configuring VPC:
1.Using the AWS console, search for VPC:
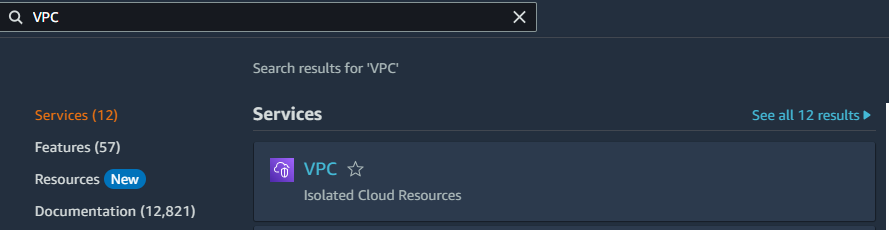
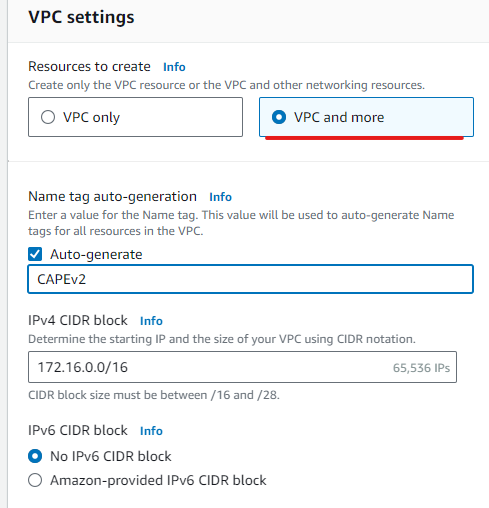
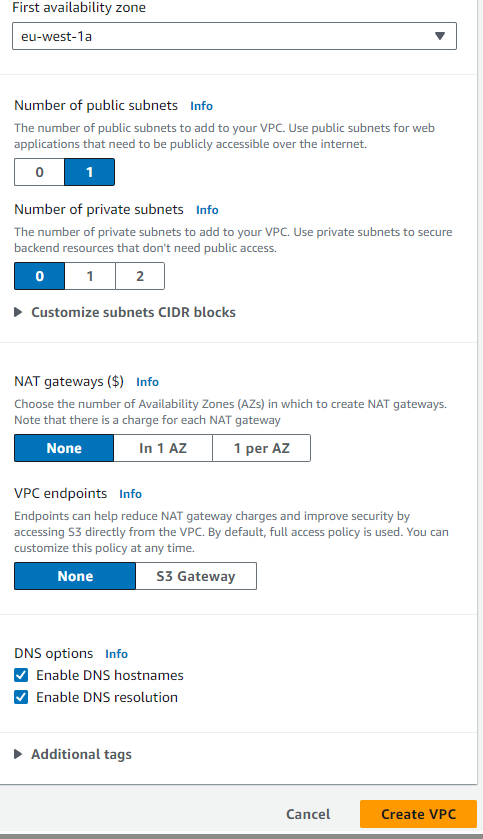
2.Click on “Create VPC.”

Use the same configuration as shown in the pictures below:
3.Set up the security groups.
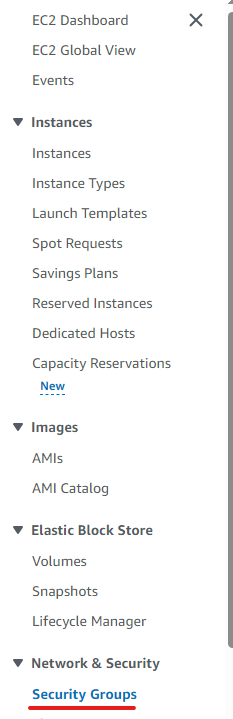
Click on “Create Security Group.”

Create the first security group CAPEv2Host
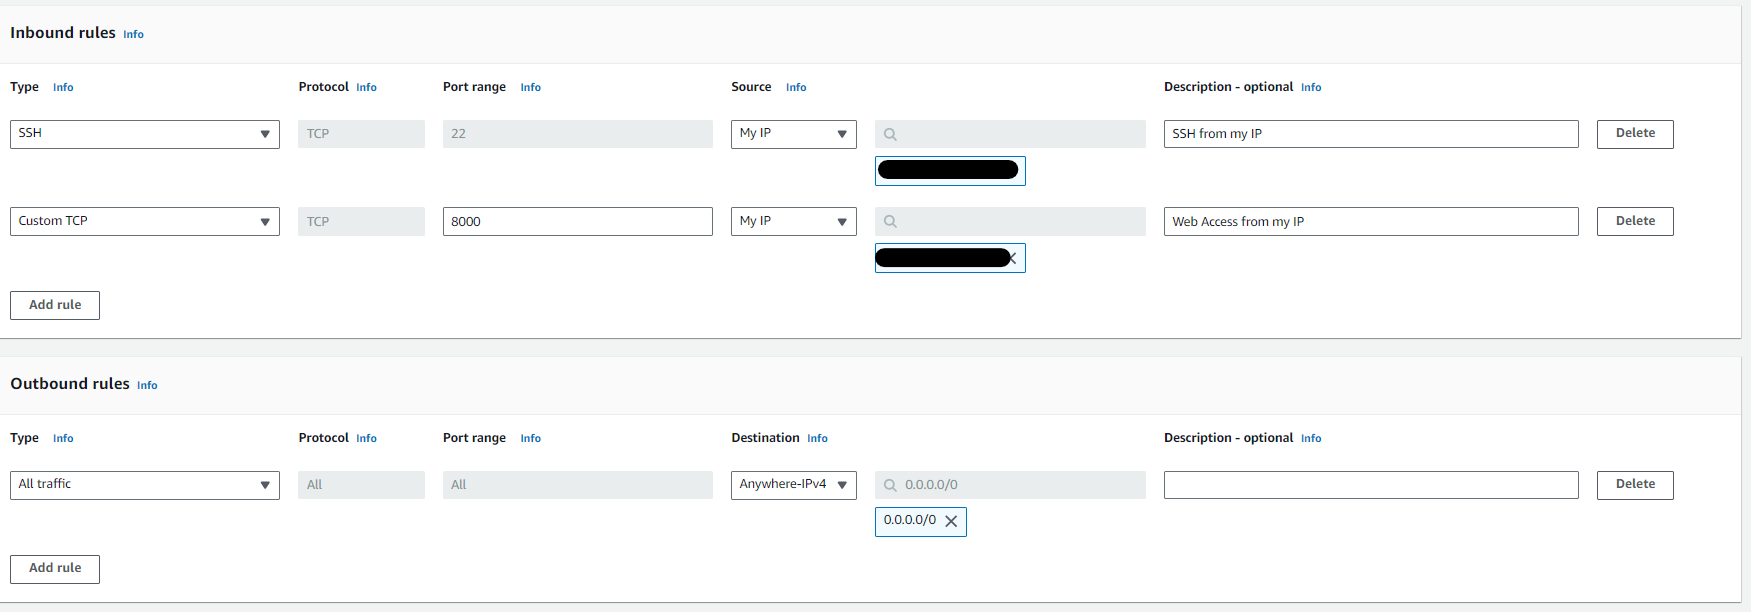
The rules should allow inbound SSH and web access on port 8000 from your own IP.
Leave the outbound rules as default. 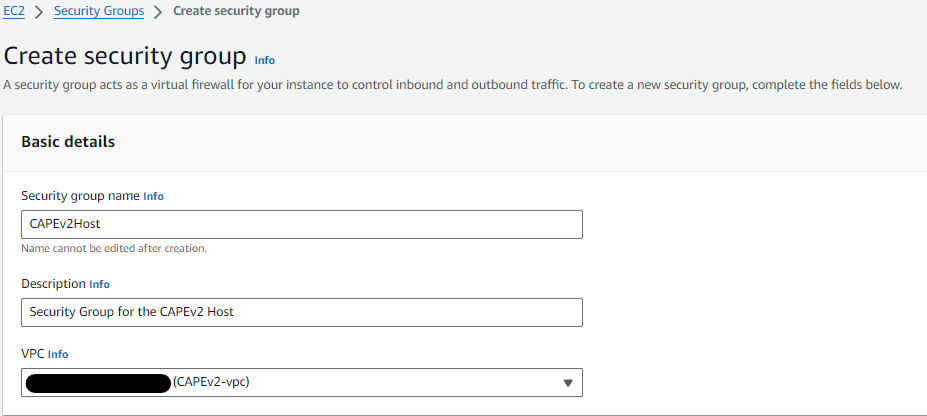
Installing and Configuring CAPEv2 Host:
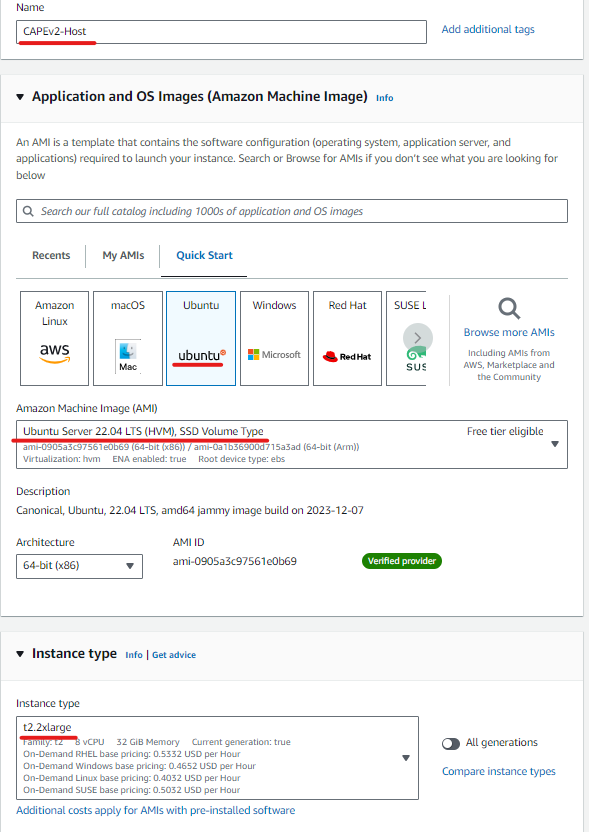
1.Create a Ubuntu Server 22.04 using EC2 with the following specifications:
- AMI: ami-0905a3c97561e0b69 (64-bit (x86)) / ami-0a1b36900d715a3ad (64-bit (Arm))
- Virtualization: HVM
- Instance Type: T2.xlarge
- Storage: 100 GB gp2
- VPC: Our Created VPC
- Security Group:CAPEv2Host
- SSH key: Required
2.Connect to the instance using SSH
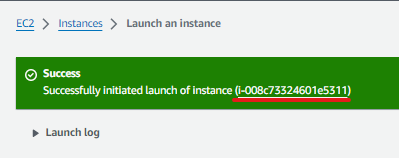
Click on that instance

Choose “Connect”

3.Connecting to the instance and running the following commands:
Elevate to root:
1
sudo -i
Update and Upgrade packages
1
apt-get update && apt-get upgrade -y
Exit root
1
exit
Download the CAPEv2 bash script installer
1
wget https://raw.githubusercontent.com/kevoreilly/CAPEv2/master/installer/cape2.sh
Make the bash script executable
1
chmod +xr cape2.sh
Execute the script as root
1
sudo ./cape2.sh all cape | tee cape.log
Once The installation has completed move to the CAPEv2 folder
1
cd /opt/CAPEv2
Install dependencies using poetry(as a non-root user)
1
poetry install
Command to fix a DB error
1
sudo -u postgres -H sh -c "psql -d \"cape\" -c \"ALTER DATABASE cape OWNER TO cape;\""
Reboot
1
sudo reboot
Reconnect to the instance and navigate to the CAPEv2 directory.
1
cd /opt/CAPEv2
Verify that the dependencies were installed, and the virtual environment was created
1
poetry show
1
poetry env list
Update the Dependencies
1
sudo poetry update
Install additional dependencies
1
sudo -u cape poetry run pip3 install https://github.com/CAPESandbox/peepdf/archive/20eda78d7d77fc5b3b652ffc2d8a5b0af796e3dd.zip#egg=peepdf==0.4.2
1
sudo -u cape poetry run pip install -U git+https://github.com/DissectMalware/batch_deobfuscator
1
sudo -u cape poetry run pip install -U git+https://github.com/CAPESandbox/httpreplay
Get your internal server IP
1
ip a
Configure The Cuckoo.conf file so it will look like this, replace <REPLACE WITH YOUR IP> with your ip
1
sudo nano conf/cuckoo.conf
1
2
3
4
5
6
7
8
9
10
11
12
13
14
15
16
17
18
19
20
21
22
23
24
25
26
27
28
29
30
31
32
33
34
35
36
37
38
39
40
41
42
43
44
45
46
47
48
49
50
51
52
53
54
55
56
57
58
59
60
61
62
63
64
65
66
67
68
69
70
71
72
73
74
75
76
77
78
79
80
81
82
83
84
85
86
87
88
89
90
91
92
93
94
95
96
97
98
99
100
101
102
103
104
105
106
107
108
109
110
111
112
113
114
115
116
117
118
119
120
121
122
123
124
125
126
127
128
129
130
131
132
133
134
135
136
137
138
139
140
141
142
143
144
145
146
147
148
149
150
151
152
153
154
155
156
157
158
159
160
161
162
163
164
165
166
167
168
169
170
171
172
173
174
175
176
177
178
179
180
181
182
183
184
185
186
187
188
189
190
191
192
193
194
195
196
197
198
199
200
201
202
203
204
205
206
207
208
209
210
211
212
213
214
215
216
217
218
219
220
221
222
223
224
225
[cuckoo]

# Which category of tasks do you want to analyze?
categories = static, pcap, url, file

# If turned on, Cuckoo will delete the original file after its analysis
# has been completed.
delete_original = off

# Archives are not deleted by default, as it extracts and "original file" become extracted file
delete_archive = on

# If turned on, Cuckoo will delete the copy of the original file in the
# local binaries repository after the analysis has finished. (On *nix this
# will also invalidate the file called "binary" in each analysis directory,
# as this is a symlink.)
delete_bin_copy = off

# Specify the name of the machinery module to use, this module will
# define the interaction between Cuckoo and your virtualization software
# of choice.
machinery = aws

# Enable screenshots of analysis machines while running.
machinery_screenshots = off

# Specify if a scaling bounded semaphore should be used by the scheduler for tasking the VMs.
# This is only applicable to auto-scaling machineries such as Azure and AWS.
# There is a specific configuration key in each machinery that is used to initialize the semaphore.
# For Azure, this configuration key is "total_machines_limit"
# For AWS, this configuration key is "dynamic_machines_limit"
scaling_semaphore = off
# A configurable wait time between updating the limit value of the scaling bounded semaphore
scaling_semaphore_update_timer = 10
# Allow more than one task scheduled to be assigned at once for better scaling
# A switch to allow batch task assignment, a method that can more efficiently assign tasks to available machines
batch_scheduling = off
# The maximum number of tasks assigned to machines per batch, optimal value dependent on deployment
max_batch_count = 20

# Enable creation of memory dump of the analysis machine before shutting
# down. Even if turned off, this functionality can also be enabled at
# submission. Currently available for: VirtualBox and libvirt modules (KVM).
memory_dump = off

# When the timeout of an analysis is hit, the VM is just killed by default.
# For some long-running setups it might be interesting to terminate the
# moinitored processes before killing the VM so that connections are closed.
terminate_processes = off

# Enable automatically re-schedule of "broken" tasks each startup.
# Each task found in status "processing" is re-queued for analysis.
reschedule = off

# Fail "unserviceable" tasks as they are queued.
# Any task found that will never be analyzed based on the available analysis machines
# will have its status set to "failed".
fail_unserviceable = on

# Limit the amount of analysis jobs a Cuckoo process goes through.
# This can be used together with a watchdog to mitigate risk of memory leaks.
max_analysis_count = 0

# Limit the number of concurrently executing analysis machines.
# This may be useful on systems with limited resources.
# Set to 0 to disable any limits.
max_machines_count = 10

# Limit the amount of VMs that are allowed to start in parallel. Generally
# speaking starting the VMs is one of the more CPU intensive parts of the
# actual analysis. This option tries to avoid maxing out the CPU completely.
# This configuration option is only relevant for machineries that have a set
# amount of VMs and are restricted by CPU usage.
# If you are using an auto-scaling machinery such as Azure or AWS,
# set this value to 0.
max_vmstartup_count = 5

# Minimum amount of free space (in MB) available before starting a new task.
# This tries to avoid failing an analysis because the reports can't be written
# due out-of-diskspace errors. Setting this value to 0 disables the check.
# (Note: this feature is currently not supported under Windows.)
freespace = 0
# Process tasks, but not reach out of memory
freespace_processing = 15000

# Temporary directory containing the files uploaded through Cuckoo interfaces
# (web.py, api.py, Django web interface).
tmppath = /tmp

# Delta in days from current time to set the guest clocks to for file analyses
# A negative value sets the clock back, a positive value sets it forward.
# The default of 0 disables this option
# Note that this can still be overridden by the per-analysis clock setting
# and it is not performed by default for URL analysis as it will generally
# result in SSL errors
daydelta = 0

# Path to the unix socket for running root commands.
rooter = /tmp/cuckoo-rooter

# Enable if you want to see a DEBUG log periodically containing backlog of pending tasks, locked vs unlocked machines.
# NOTE: Enabling this feature adds 4 database calls every 10 seconds.
periodic_log = off

# Max filename length for submissions, before truncation. 196 is arbitrary.
max_len = 196

# If it is greater than this, call truncate the filename further for sanitizing purposes.
# Length truncated to is controlled by sanitize_to_len.
#
# This is to prevent long filenames such as files named by hash.
sanitize_len = 32
sanitize_to_len = 24

[resultserver]
# The Result Server is used to receive in real time the behavioral logs
# produced by the analyzer.
# Specify the IP address of the host. The analysis machines should be able
# to contact the host through such address, so make sure it's valid.
# NOTE: if you set resultserver IP to 0.0.0.0 you have to set the option
# `resultserver_ip` for all your virtual machines in machinery configuration.
ip = <REPLACE WITH YOUR IP>

# Specify a port number to bind the result server on.
port = 2042

# Force the port chosen above, don't try another one (we can select another
# port dynamically if we can not bind this one, but that is not an option
# in some setups)
force_port = yes

pool_size = 0

# Should the server write the legacy CSV format?
# (if you have any custom processing on those, switch this on)
store_csvs = off

# Maximum size of uploaded files from VM (screenshots, dropped files, log)
# The value is expressed in bytes, by default 100MB.
upload_max_size = 100000000

# To enable trimming of huge binaries go to -> web.conf -> general -> enable_trim
# Prevent upload of files that passes upload_max_size?
do_upload_max_size = no

[processing]
# Set the maximum size of analyses generated files to process. This is used
# to avoid the processing of big files which may take a lot of processing
# time. The value is expressed in bytes, by default 200MB.
analysis_size_limit = 200000000

# Enable or disable DNS lookups.
resolve_dns = on

# Enable or disable reverse DNS lookups
# This information currently is not displayed in the web interface
reverse_dns = off

# Enable PCAP sorting, needed for the connection content view in the web interface.
sort_pcap = on

[database]
# Specify the database connection string.
# Examples, see documentation for more:
# sqlite:///foo.db
# postgresql://foo:bar@localhost:5432/mydatabase
# mysql://foo:bar@localhost/mydatabase
# If empty, default is a SQLite in db/cuckoo.db.
# SQLite doens't support database upgrades!
# For production we strongly suggest go with PostgreSQL
connection = postgresql://cape:SuperPuperSecret@localhost:5432/cape
# If you use PostgreSQL: SSL mode
# https://www.postgresql.org/docs/current/libpq-ssl.html#LIBPQ-SSL-SSLMODE-STATEMENTS
psql_ssl_mode = disable

# Database connection timeout in seconds.
# If empty, default is set to 60 seconds.
timeout =

# Log all SQL statements issued to the database.
log_statements = off

[timeouts]
# Set the default analysis timeout expressed in seconds. This value will be
# used to define after how many seconds the analysis will terminate unless
# otherwise specified at submission.
default = 200

# Set the critical timeout expressed in (relative!) seconds. It will be added
# to the default timeout above and after this timeout is hit
# Cuckoo will consider the analysis failed and it will shutdown the machine
# no matter what. When this happens the analysis results will most likely
# be lost.
critical = 60

# Maximum time to wait for virtual machine status change. For example when
# shutting down a vm. Default is 300 seconds.
vm_state = 300

[tmpfs]
# only if you using volatility to speedup IO
# mkdir -p /mnt/tmpfs
# mount -t tmpfs -o size=50g ramfs /mnt/tmpfs
# chown cape:cape /mnt/tmpfs
#
# vim /etc/fstab
# tmpfs       /mnt/tmpfs tmpfs   nodev,nosuid,noexec,nodiratime,size=50g   0 0
#
# Add crontab with
# @reboot chown cape:cape /mnt/tmpfs -R
enabled = off
path = /mnt/tmpfs/
# in mb
freespace = 2000

[cleaner]
# Invoke cleanup if <= of free space detected. see/set freespace/freespace_processing
enabled = no
# set any value to 0 to disable it. In days
binaries_days = 5
tmp_days = 5
# Remove analysis folder
analysis_days = 5
# Delete mongo data
mongo = no
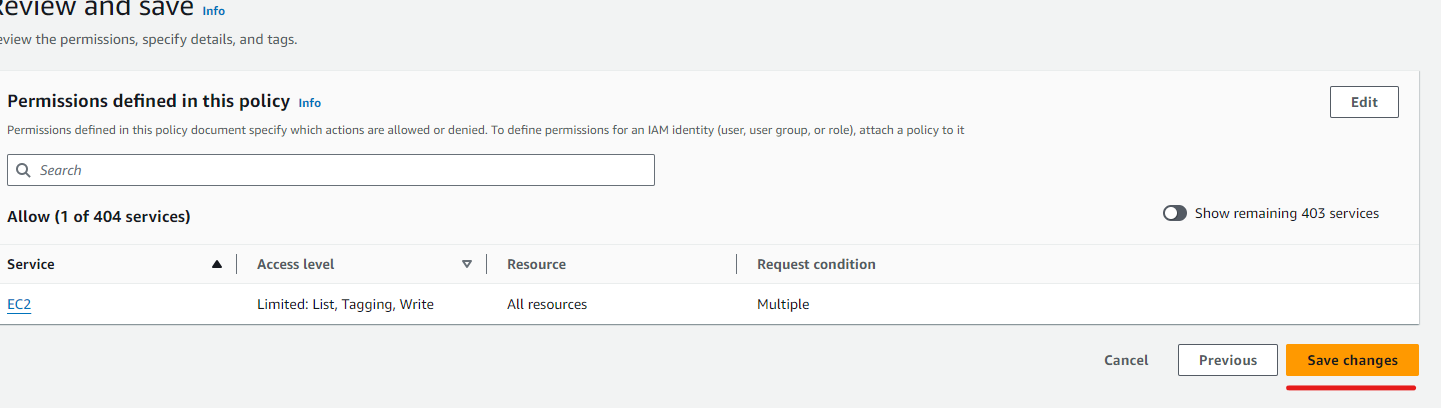
3.Create an IAM policy and role
- Choose Json and paste the following policy
- Replace the values with your own resources.
1
2
3
4
5
6
7
8
9
10
11
12
13
14
15
16
17
18
19
20
21
22
23
24
25
26
27
28
29
30
31
{
    "Version": "2012-10-17",
    "Statement": [
        {
            "Effect": "Allow",
            "Action": [
                "ec2:RunInstances",
                "ec2:ModifyInstanceAttribute",
                "ec2:TerminateInstances",
                "ec2:StopInstances",
                "ec2:CreateTags",
                "ec2:StartInstances"
            ],
            "Resource": [
                "arn:aws:ec2:<YOUR REGION>::image/<YOUR AMI ID>",
                "arn:aws:ec2:<YOUR REGION>:<YOUR ACCOUNT ID>:network-interface/*",
                "arn:aws:ec2:<YOUR REGION>:<YOUR ACCOUNT ID>:security-group/<YOUR CAPEv2 GUEST SECURITY GROUP ID>",
                "arn:aws:ec2:<YOUR REGION>:<YOUR ACCOUNT ID>:instance/*",
                "arn:aws:ec2:<YOUR REGION>:<YOUR ACCOUNT ID>:subnet/<SUBNET ID>",
                "arn:aws:ec2:<YOUR REGION>:<YOUR ACCOUNT ID>:volume/*"
            ]
        },
        {
            "Effect": "Allow",
            "Action": [
                "ec2:Describe*"
            ],
            "Resource": "*"
        }
    ]
}

Hit Next:
Choose policy name
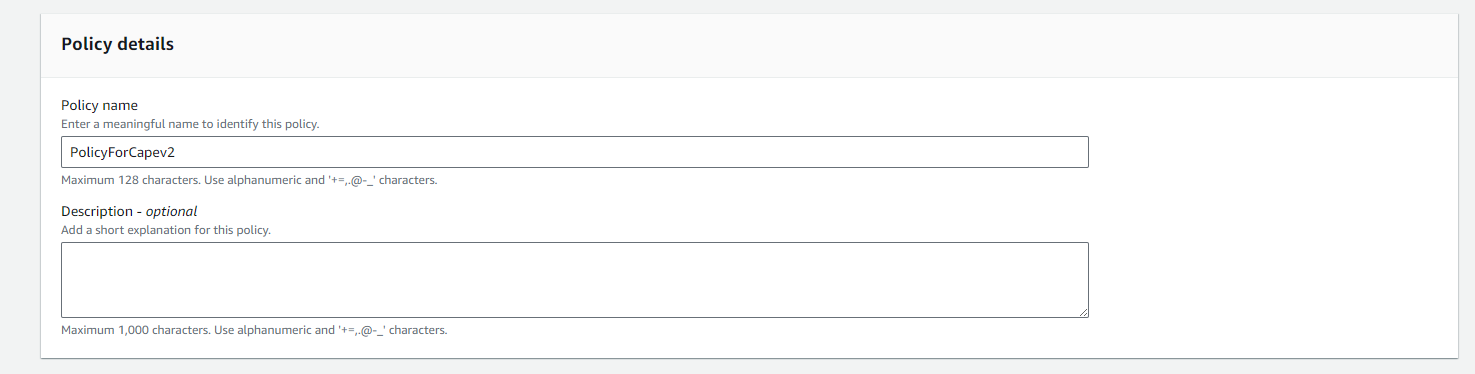
Choose policy name
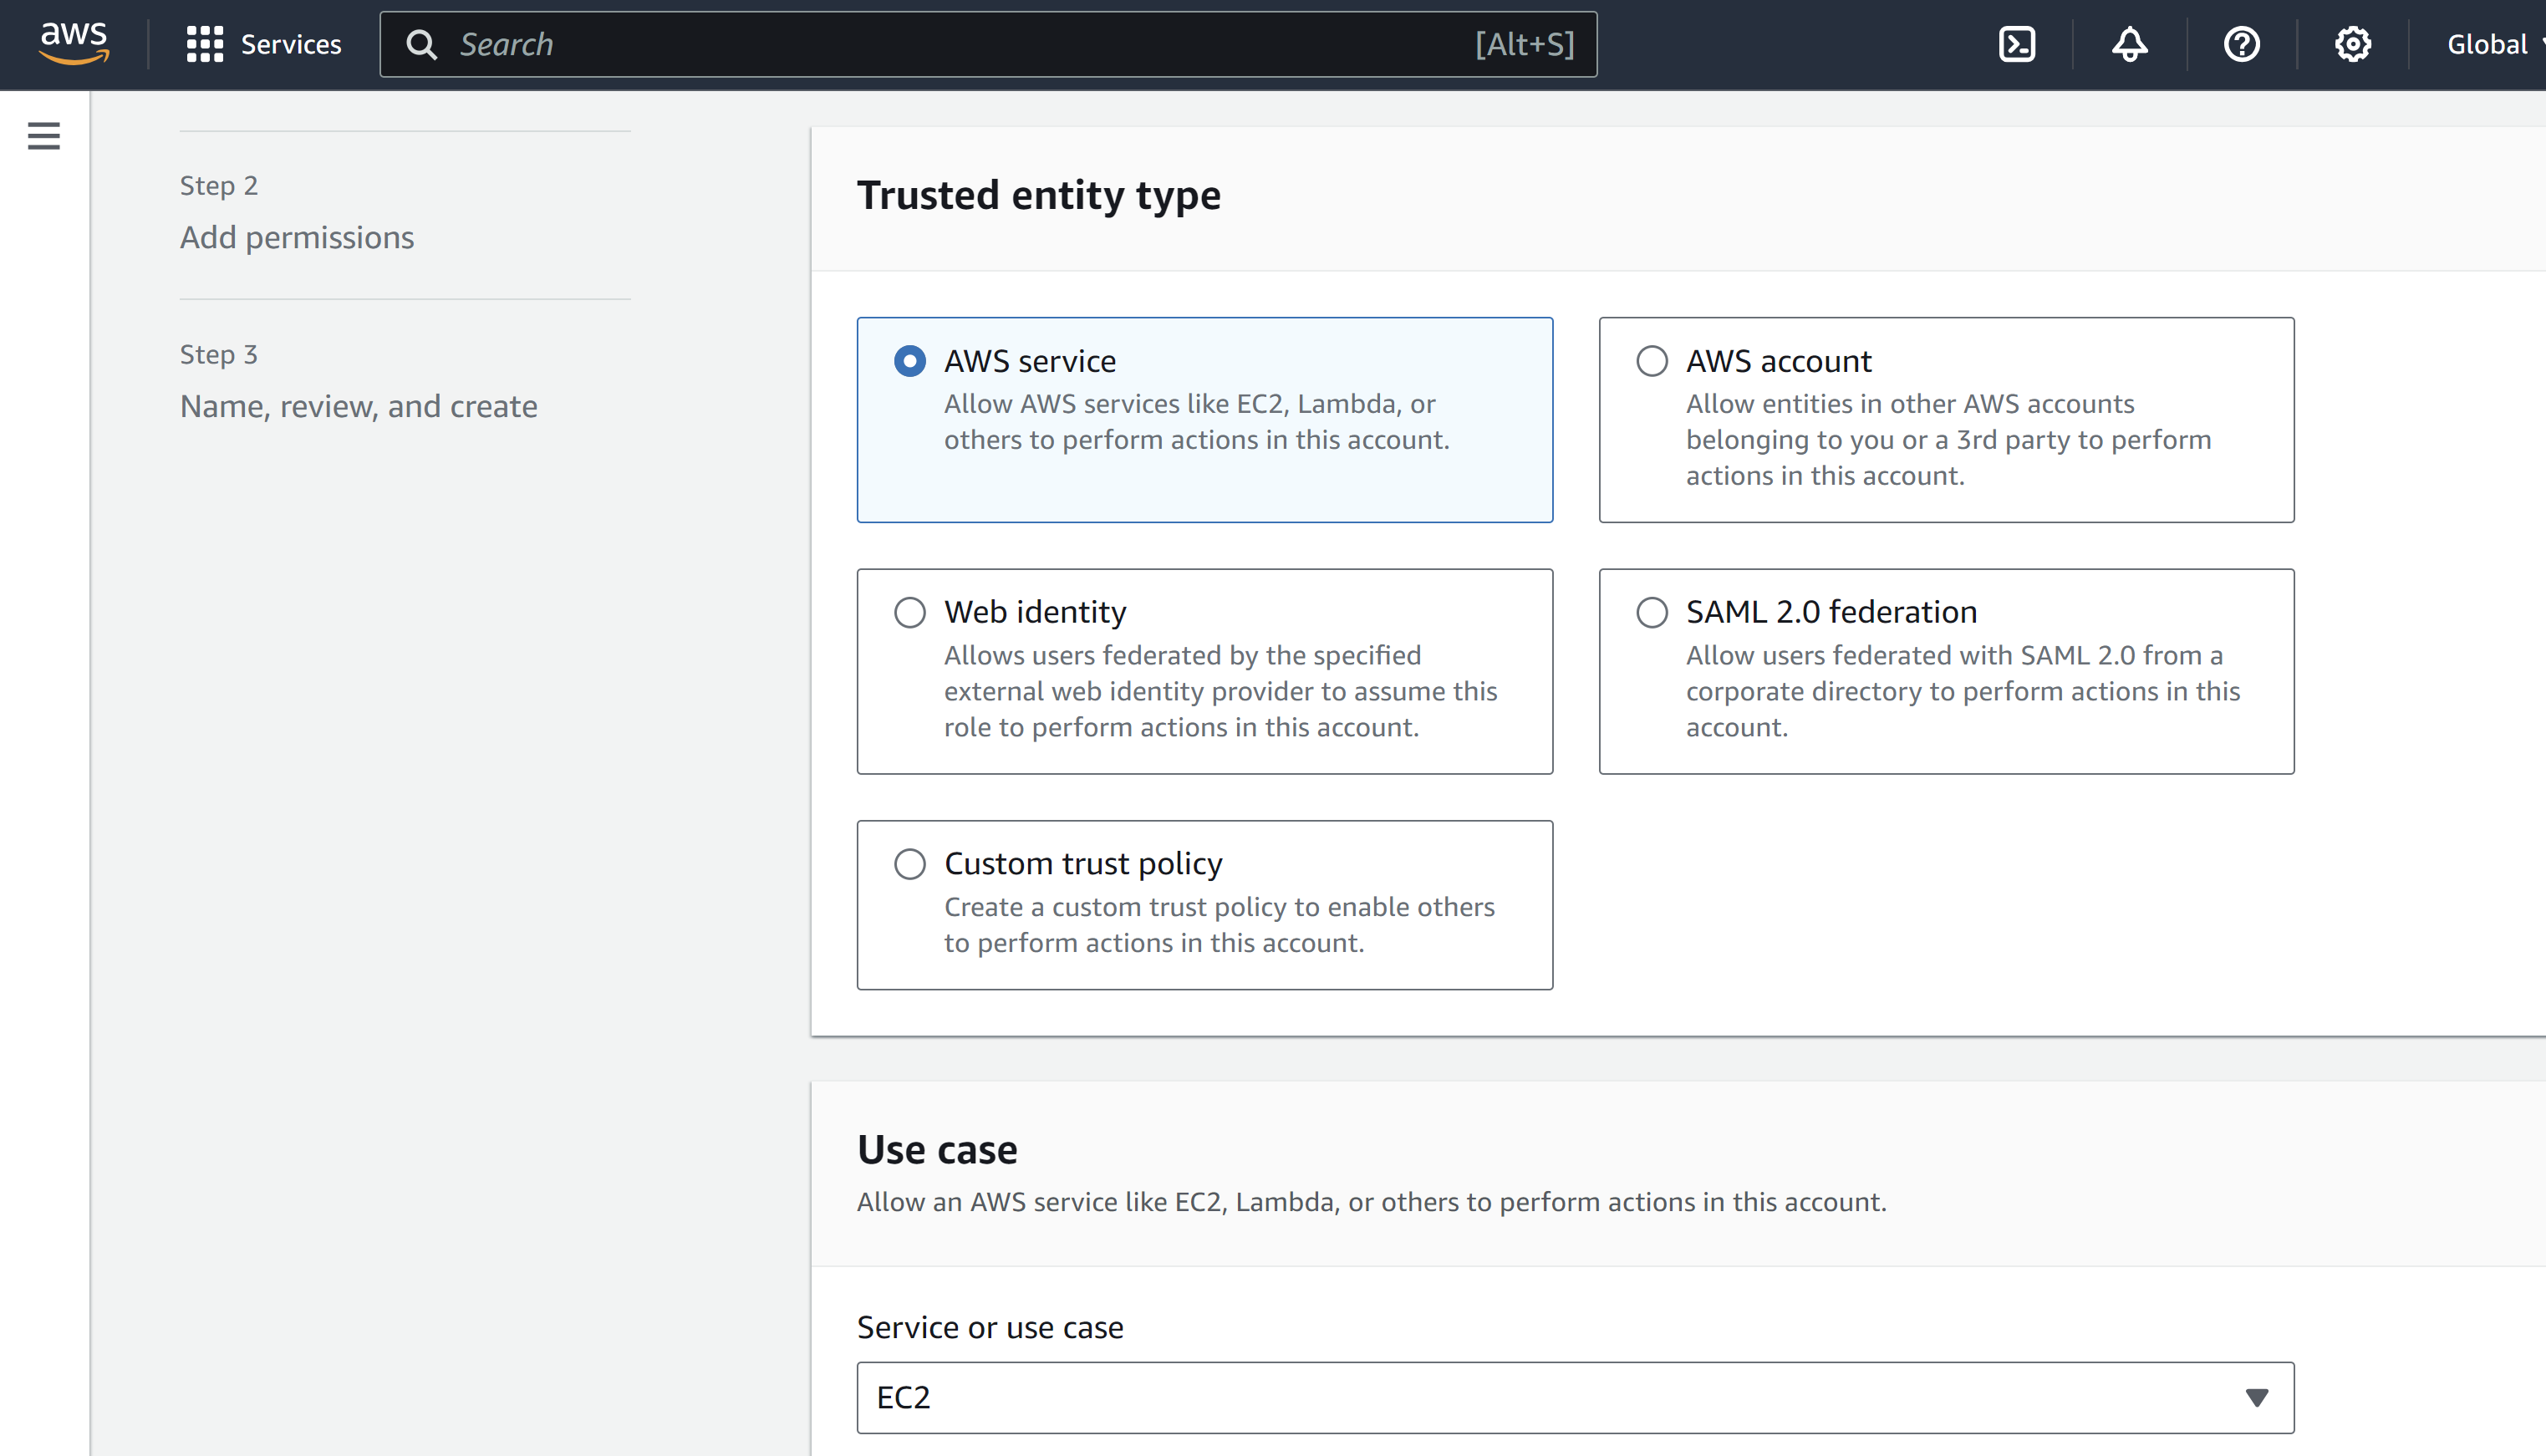
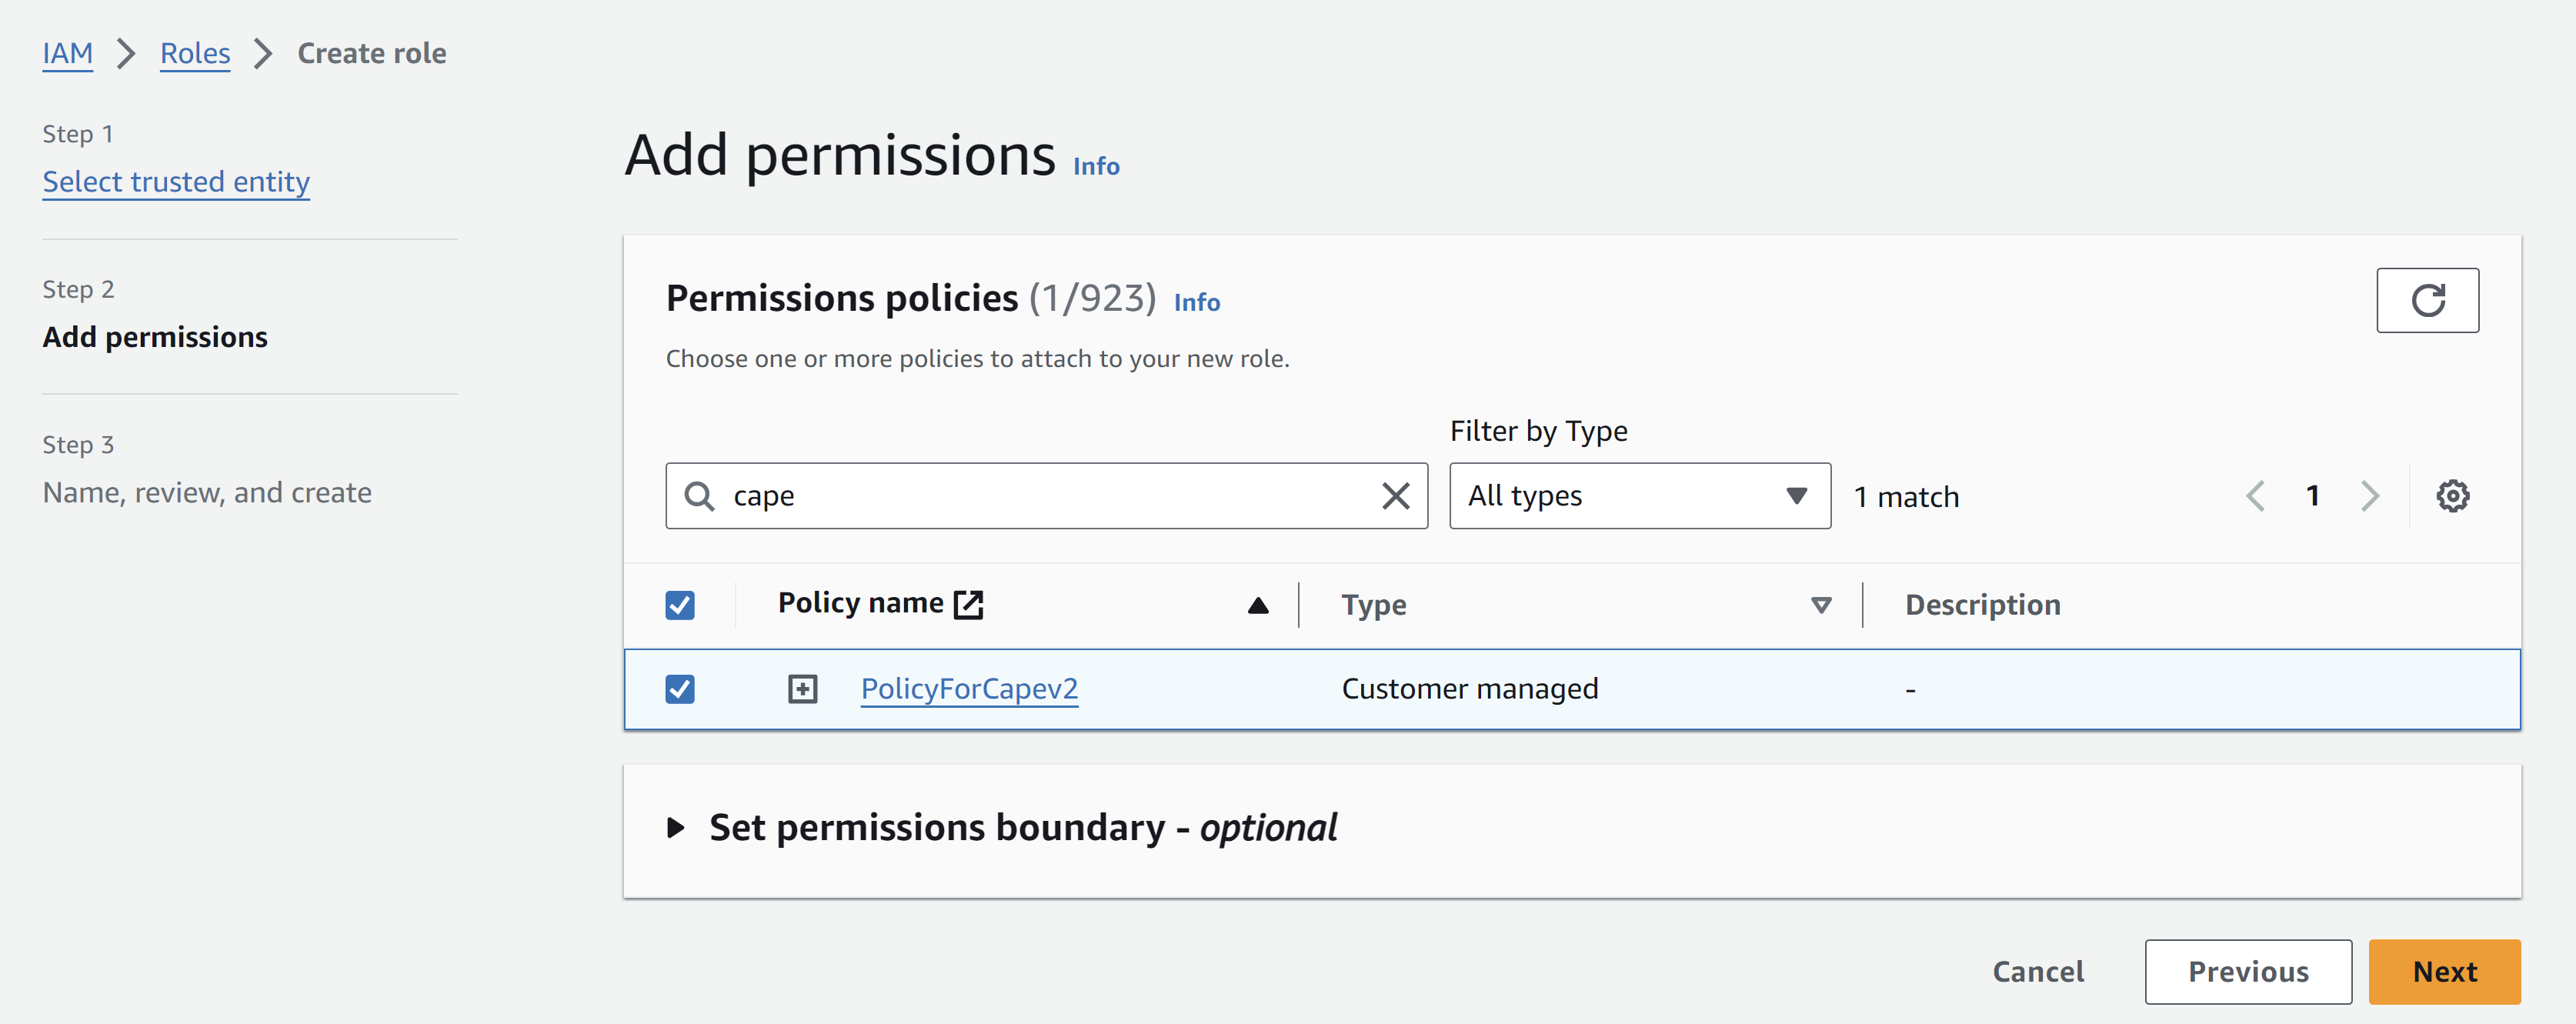
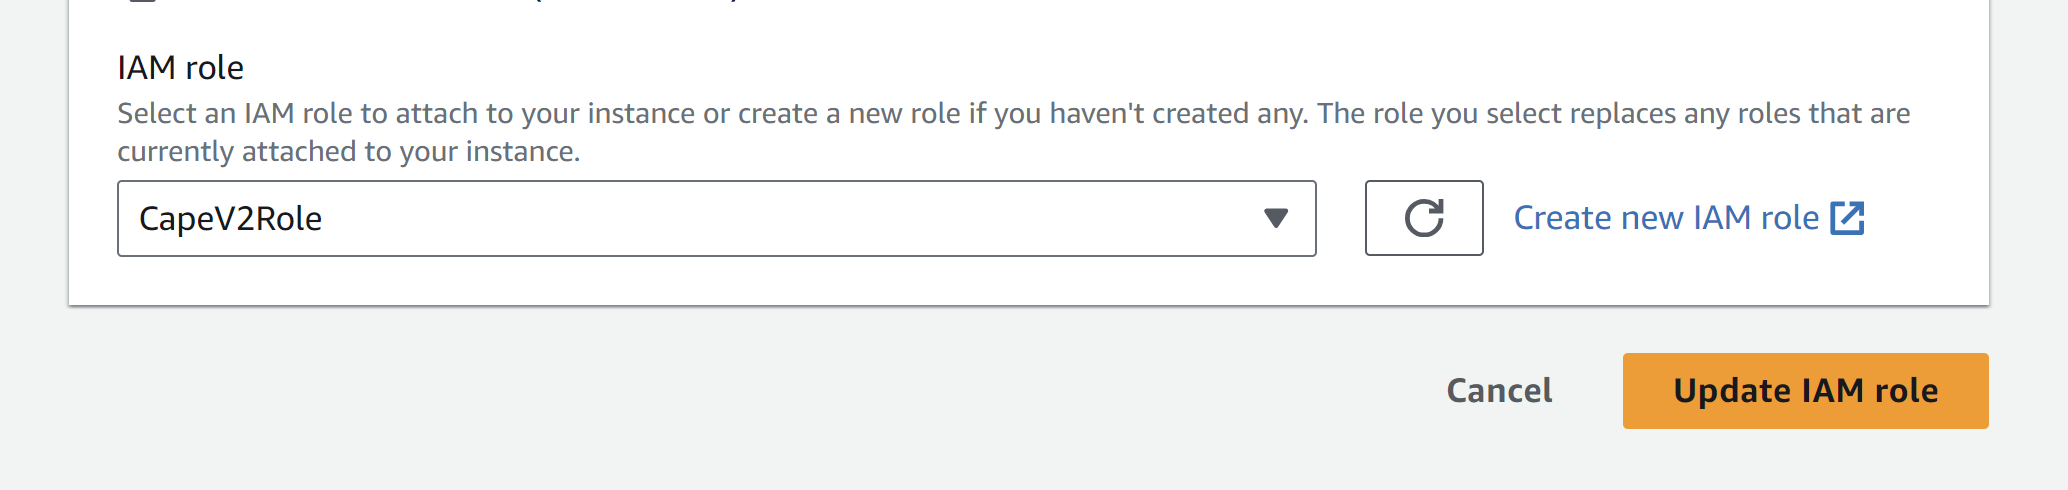
Create an IAM role for the CAPEv2 EC2 instance

Attach the role to the CAPEv2 host EC2 instance 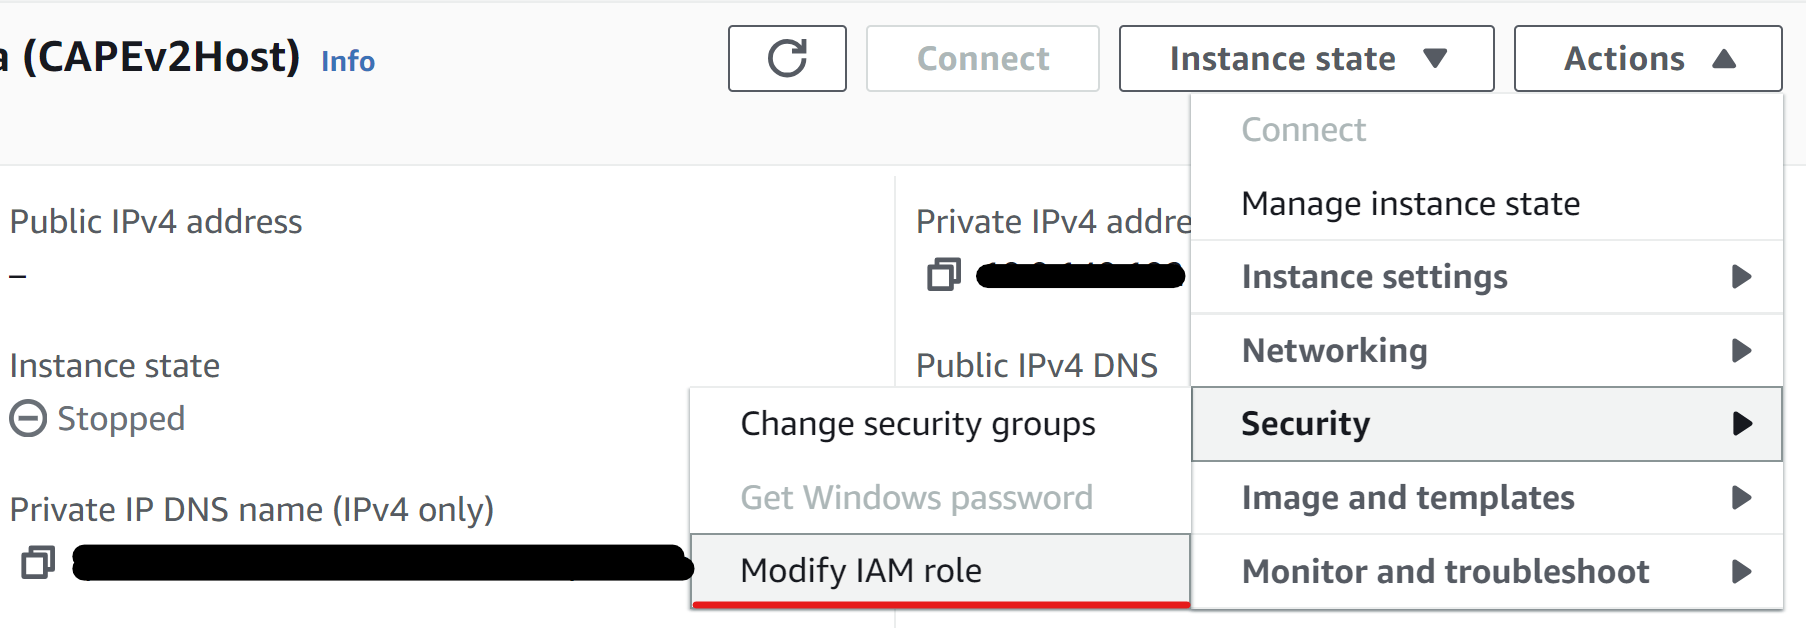
4.Create a security group for the CAPE guest The group should never allow any access to the internet. One disadvantage in AWS is that according to AWS policy when configuring a sandbox, the machines are not allowed to have internet access, even through a proxy.
The outbound rules should allow access only to the CAPEv2Host security group. The inbound rules should allow all traffic from the CAPEv2Host security group and RDP access from your own IP (for debugging purposes).
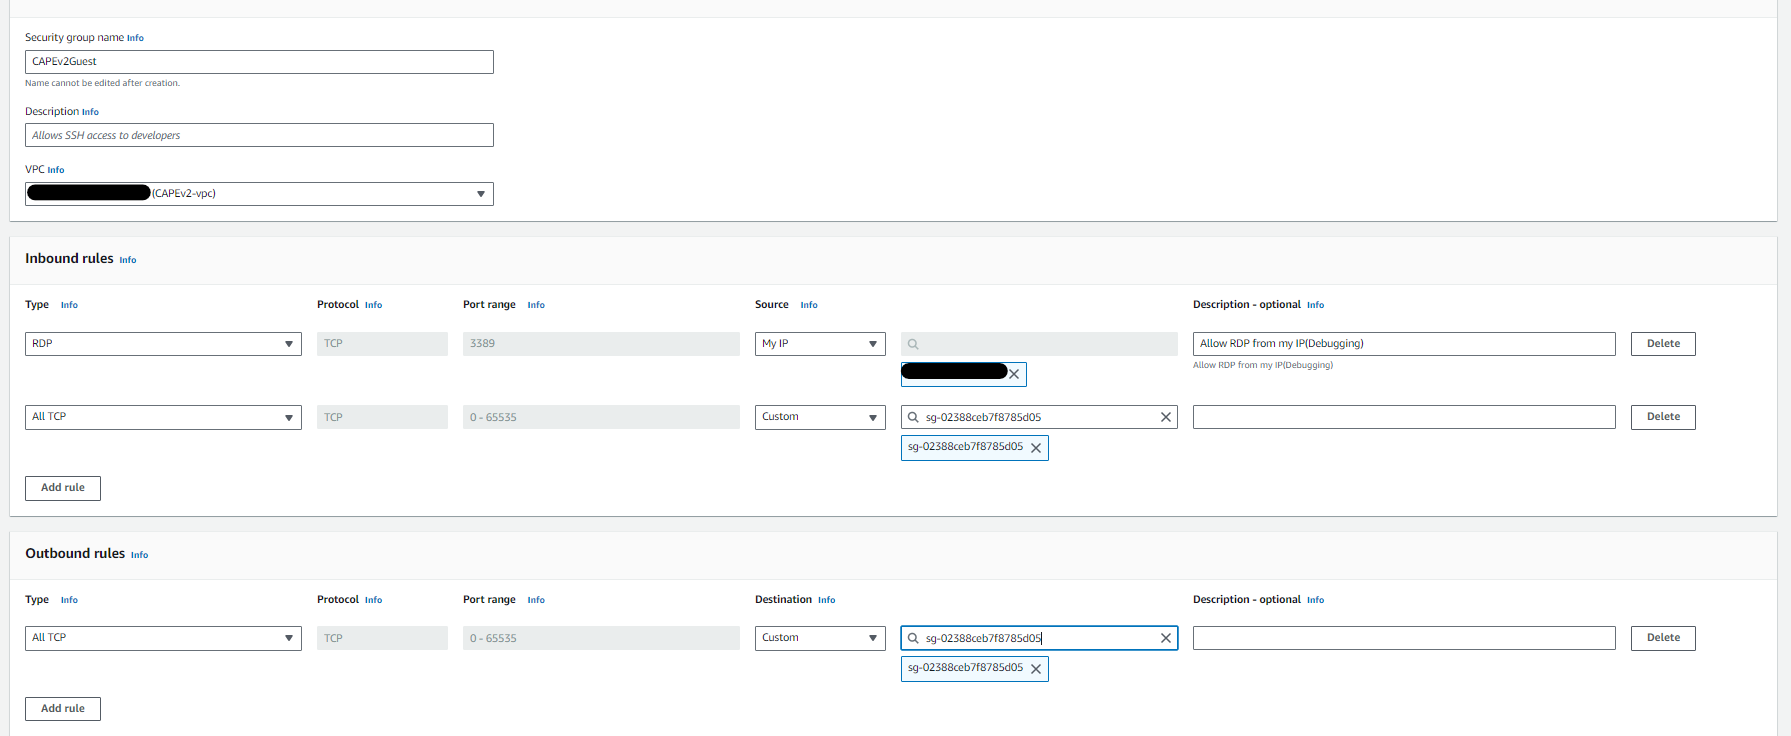
5.Get back to the CAPEhost security group and allow all TCP traffic from the newly created guest security group.

6.Reconnect to the Cape Host Ubuntu server
- install boto3
1
cd /opt/CAPEv2/
1
sudo -u cape poetry run pip3 install boto3
- Configure the AWS machinery conf file
1
sudo nano conf/aws.conf
- Change the following:
- Add region name >
region_name = - Add availability zone >
availability_zone =
Warning: Warning: Writing access keys directly to the EC2 instance is considered a bad practice. Alternatively, attach the IAM role directly to the EC2 instance and leave the aws_access_key_id and aws_secret_access_key variables blank.
- Add AWS access key id >
aws_access_key_id = - Add AWS secret access key >
aws_secret_access_key = - Change dynamic_machines_limit >
dynamic_machines_limit = 1 - change image_id to your real ami ID >
image_id - Change the instance_type to t3.large (can be any other size as well, but it will impact performance). >
instance_type - Change subnet id to the subnet id of your CAPE host >
subnet_id - Change security group to the guest security group >
security_groups - Replace
#interfacewithinterface = eth0 - Delete everything after
arch = x64
Restart the cape service
1
sudo systemctl restart cape.service
1
journalctl -u cape.service -f
If everything was installed and configured successfully, you should be able to see this: 
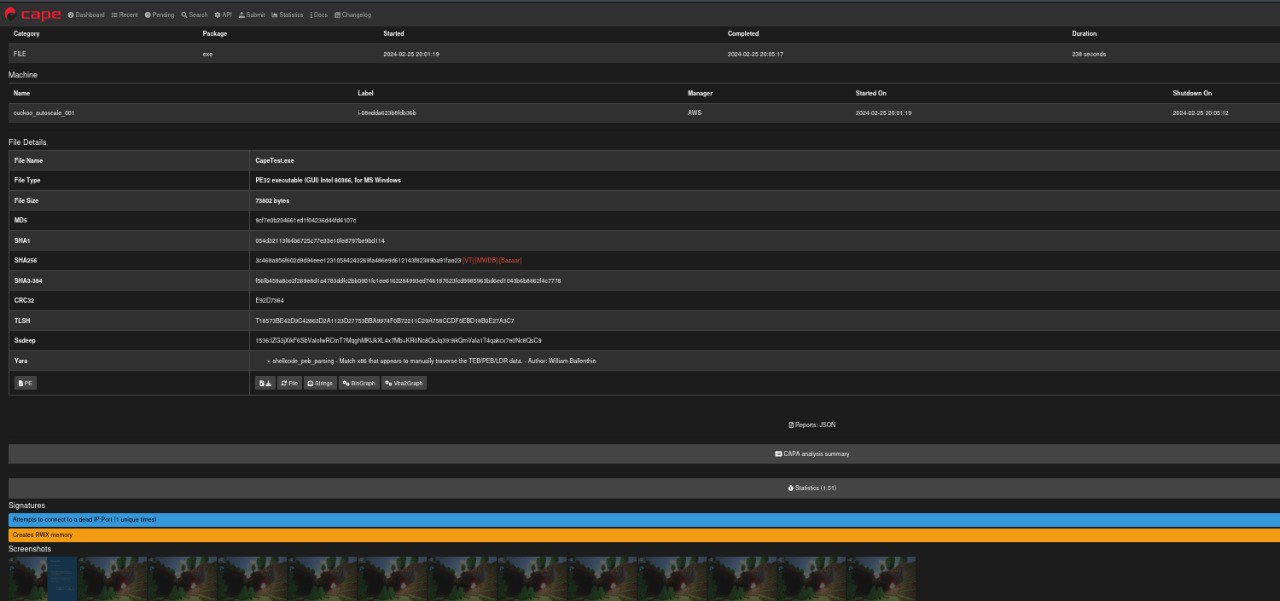
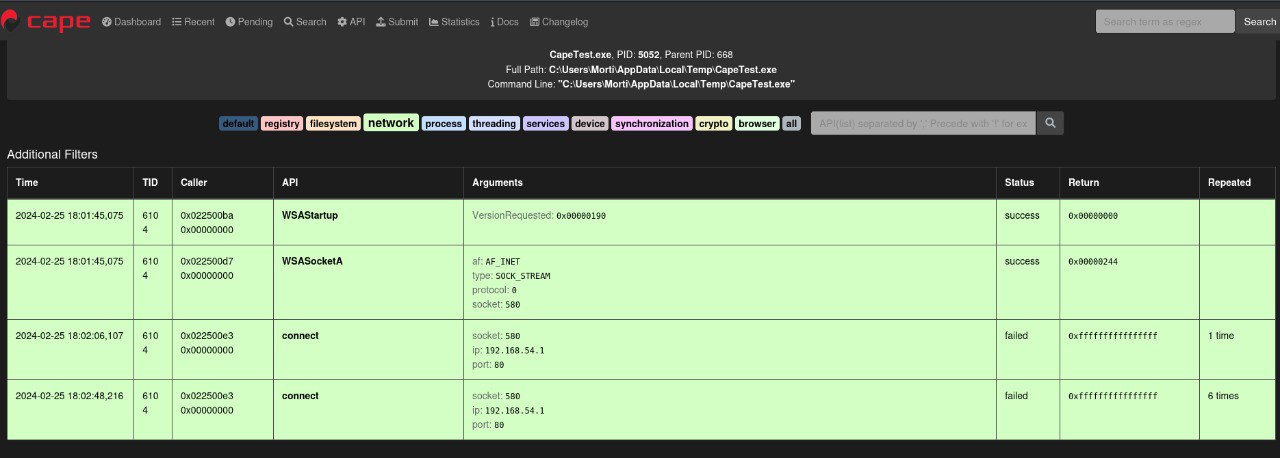
Demo Time!
For this demo, I have created a basic Msfvenom executable reverse shell and uploaded it to CAPE for analysis.
- generating the executble

- Cape Service log after submission.


- Analysis results:
References:
https://research.checkpoint.com/2019/cuckoo-system-on-aws/https://github.com/CheckPointSW/Cuckoo-AWS
https://capev2.readthedocs.io/en/latest/index.html
https://docs.aws.amazon.com/vm-import/latest/userguide/required-permissions.html#vmimport-role
https://d1.awsstatic.com/events/aws-reinforce-2022/NIS231_Malware-analysis-with-AWS.pdf